Deployment of flask project on VPS
Intro
This article presents my experience on how to deploy a Flask web application on my VPS(Virtual Private Server).
I designed an OCR-based application for paper-document recognition and retrieval, which was written in Python. For ease to use, I made it a simple web app and deployed it on my rented VPS.
Tips:
FLASK: Flask is a micro web framework written in Python.
VPS: A virtual private server (VPS) is a virtual machine sold as a service by an Internet hosting service.
from en.wikipedia.org
VPS setup
requirements:
- remote control the VPS by ssh
- have a user with root access
See my other article for details.
general setup
setup firewall
UFW, full name Uncomplicated Firewall, is a Firewall tool implemented through iptables.UFW is a encapsulation of iptables, whose rules are too complex for beginners.This article is also an extension on how to enhance VPS security. After you modify the SSH port and log in the user, it is a good idea to know which ports you have access to on your VPS and manage them with UFW to prevent abuse.Linux 下的防火墙 ufw
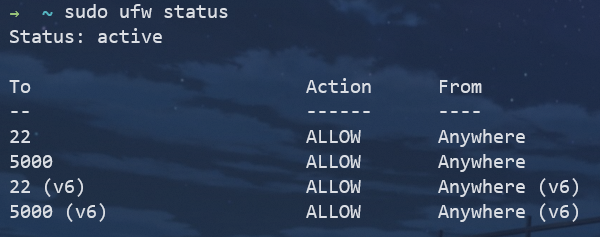
here is the command I use to set up the firewall
sudo apt install -y ufw
sudo ufw default allow outgoing
sudo ufw default deny incoming
sudo ufw allow ssh # make sure you can use ssh for remote access
sudo ufw allow 5000 # for test
sudo ufw enable
sudo ufw status
setup Flask Project
This is the file tree of the project for configuration reference.
1 | ➜ ~ pwd |
Tip: prepare a requirement.txt
Include all the package need to be installed in this flask project. if does not know what are those packages, can use command pip freeze
then use git clone to get the project files from your github repository
PS: you can use scp as well.
Install environment requirements
sudo apt install -y python3-pip
sudo apt install -y python3-venv
git clone repository(my example)
mkdir Projects
cd Projects
Create and active Virtual environment
python3 -m venv {Your Project Dir}/venv
source venv/bin/activate

Then we can install all requirements with requirements.txt
pip install -r requirements.txt
if this step has problems, you can install the requirements manually using pip install {package name} as well.
setup nginx & gunicorn
Because the poor performance of wsgi of flask, we need use nginx + gunicorn to get better performance and security.
Nginx is a web server that can also be used as a reverse proxy, load balancer, mail proxy and HTTP cache.
and gunicorn means Multi-process/multi-threading/automatic-restart
sudo apt install -y nginx
sudo rm /etc/nginx/sites-enabled/default
sudo vim /etc/nginx/sites-enabled/$ProjectName
1 | server{ |
the /home/tom/Projects/{ProjectName}/app/static is the location of the static files of your Flask Project.
if you cannot save in vim, try this:
:w !sudo tee % > /dev/null
setup ufw again
sudo ufw allow http/tcp
sudo ufw delete allow 5000
sudo ufw enable
sudo systemctl restart nginx
gunicorn start
pip install gunicorn
gunicorn -w {worker} run:app
worker = core * 2 +1
using supervisor manage gunicorn
In order for the system to continue running even after the remote connection is closed, you need to use the Supervisor to manage the gunicorn.
sudo apt-get install -y supervisor
then setup config file for supervisor
sudo vim /etc/supervisor/conf.d/$ProjectName.conf
1 | [program:{ProjectName}] |
create log file dir
sudo mkdir -p /var/log/$ProjectName
sudo touch /var/log/$ProjectName/$ProjectName.err.log
sudo touch /var/log/$ProjectName/$ProjectName.out.log
restart supervisor
sudo supervisorctl reload
Change
sudo vim /etc/nginx/nginx.conf
add this within block http
client_max_body_size {upt to you}M;

the restart nginx
sudo systemctl restart nginx
conclusion
files need to be setup about specific project
/etc/nginx/sites-enabled/$ProjectName
/etc/supervisor/conf.d/$ProjectName.conf
Other Tips
Tips: for opencv error:ImportError: libGL.so.1: cannot open shared object file: No such file or directory
try: sudo apt install libgl1-mesa-glx
test_before nginx:
export FLASK_APP=run.py
flask run –host=0.0.0.0

